Artstamp Manufacturing
This information is meant to give you a basic understanding of artistic rubber stamp production.
Prepare Your Artwork
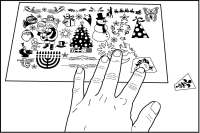
Arranging Artwork
We are often asked about artwork, how to find it, submit it, and/or create it. Artwork used for Art Stamps can be of your own creation or someone else's (be sure to get permission!). If you're not too artistically inclined, consider public domain artwork such as non-copyrighted clip art.
Another good source for non-copyrighted artwork is older periodicals. They are often found in bookstores and flea markets.
Artwork should be crisp and clear for the very best results (garbage in - garbage out). Submit your images in black and white - color and shading will not reproduce well. Avoid pencil drawings too.
Paste different images together with a glue stick or other adhesive. Keep in mind that you will need at least 1/8" of space around each design - just enough space to allow room to cut. Pricing is determined by the total number of square inches.
Here is where the stamp process begins
We prepare a metal "Photo Engraving" from your artwork. The Photo Engraving is the master plate and can be re-used many times. What is a Photo Engraving? - trust us - it's a complicated photographic process that is best described as producing a metal plate consisting of a "relief" or a raised reproduction of your artwork. The Photo Engraving master is used to create a mold for the rubber.
The Matrix Mold Is Created
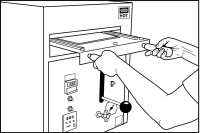
Matrix Mold Production
The Rubber Sheet is Created
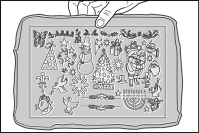
Sheet of Finished Rubber Dies
Creation of the Rubber Sheet is a simple process. Three things are necessary: the mold, raw rubber stamp gum and a rubber stamp press. The process begins by placing a single sheet of raw rubber stamp gum on top of the mold. The mold and rubber are then placed inside the Stamp Press. The hydraulic system inside the Stamp Press exerts pressure upon the gum rubber/matrix sandwich.
The rubber melts into the recessed areas of the mold and over a period of 7 to 10 minutes the rubber hardens or cures. Once cured the rubber sheet is pulled away from the mold. Voila! A sheet of rubber dies is ready to be cut and attached to mounting blocks.
Cutting & Mounting The Rubber Dies
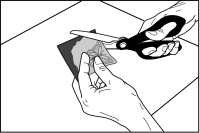
Trimming Dies
A sponge cushion is applied to the rubber sheet. The sponge helps absorb uneven downward pressure and helps to promote a crisper impression. It may also help prevent bad impressions when stamping on uneven surfaces. After applying self-adhesive sponge cushion, the rubber and cushion is cut as a single unit. Our Die Cutters make this process a breeze! Each individual die with cushion is attached to a wood mounting block most appropriate for the size of the rubber die. Choose a mount block that allows for an 1/8" margin on all sides of the rubber die. Mount blocks can be custom cut to order or you may purchase mounting wood in 18 inch lengths and cut the blocks to size with a saw. A variety of widths are available.
Last by not least ..... Indexing The Rubber Stamp
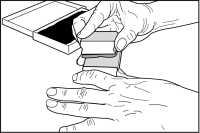
Hand Indexing
Your Art Stamp is now ready for the index. An index is an identifying mark on the top of the mount block. The index helps the user identify the stamp and often helps to align her stamp designs and scenes. In the past indexing has been accomplished by hand. With misaligned imprints and ruined blocks this can be a frustrating process. Jackson Marking Products now provides two new options for creating the index: stamping the image on the top of the block with special indexing ink using our Art Stamp Stamper or create a laser or ink jet printed label of the stamp image with EZ Indexing Sheets. EZ Indexing Sheets cut easily with scissors or paper cutter. They have an adhesive layer - simply peel and stick. Your beautiful stamp is finished!
How to Order Die Molding Services
Copyright Jackson Marking Products 2006
